Support
WIN 10 L2TP VPN setup guide
L2TP VPN setup guide – Windows 10:
The guide below will take you through the steps required to configure the native L2TP client on Windows 10. We also support OpenVPN solution for Windows. See the guide here if you would prefer to install OpenVPN.
Pre-requisite:
Before you start, please ensure that you are not connected to another VPN already, and that you do not have any other unblocking solutions (such as Hola) installed on your machine. If you have a Hola extension on your browser, you need to remove it (it will still be active even if its disabled). There is a video here to guide you through the setup.
Each step explained with image for reference, please follow each step carefully for successful setup.
Steps:
1) From the lower right corner click on “Action Center” icon.
2) Then press on “VPN”.

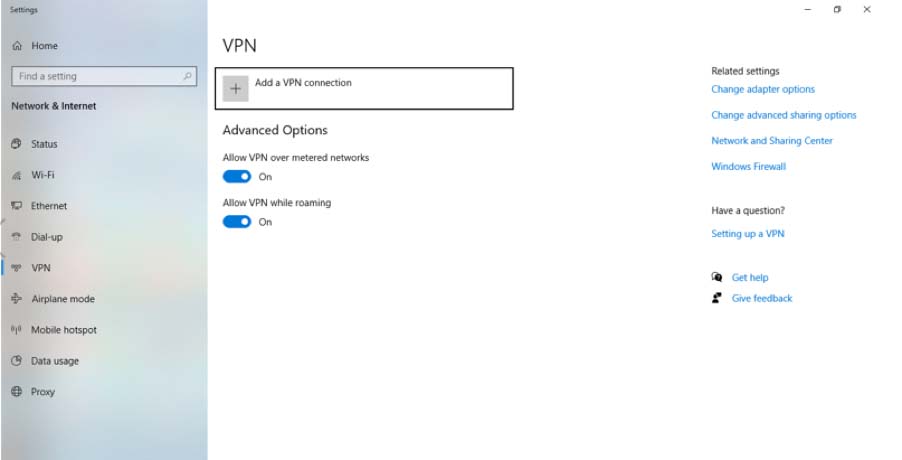
3) This will open “Network & Internet” settings window. Click on “Add a VPN connection”.
4) On Add a VPN connection pop-up window add each information as below.
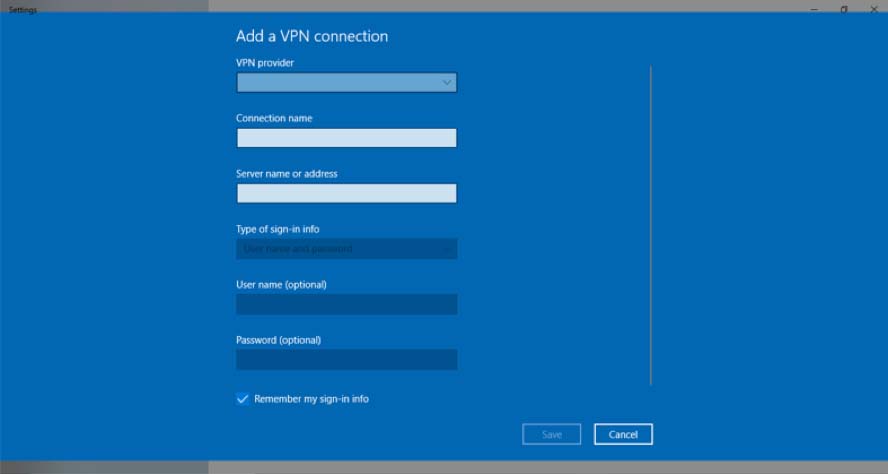
4.1 VPN provider: Windows (built-in)

4.2 Connection Name: Give any specific name as per your choice.

4.3 Server name or address: Add server address from the list that you would like to connect with.

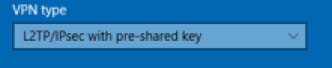
4.4 VPN type: select “L2TP/IP sec with pre-shared key”.
4.5 Pre-shared Key: happiness

4.6 Type of Sing-in info: Select Username and password option.

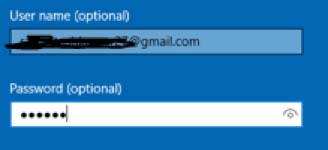
4.7 Username & Password: copy & paste the username and password from the ‘my account’ section of our site (note all credentials are case sensitive). Check all selected data once again and press “Save”.
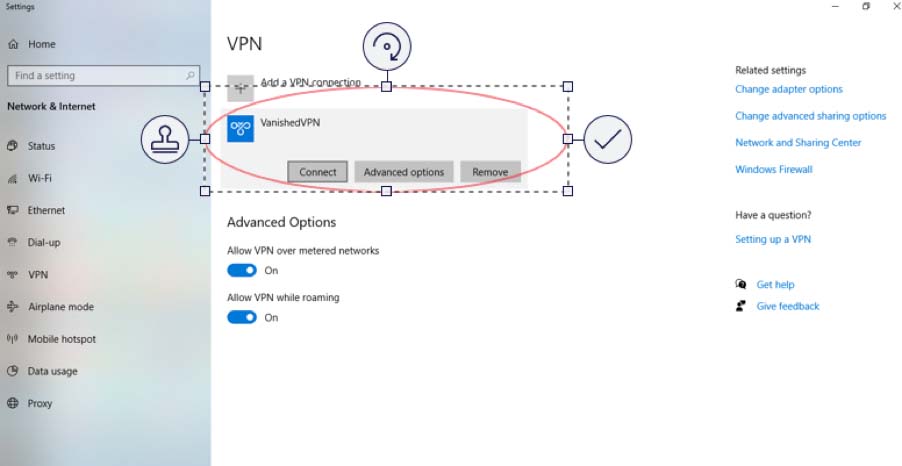
5) Now you can see your VPN connection setup has been created.

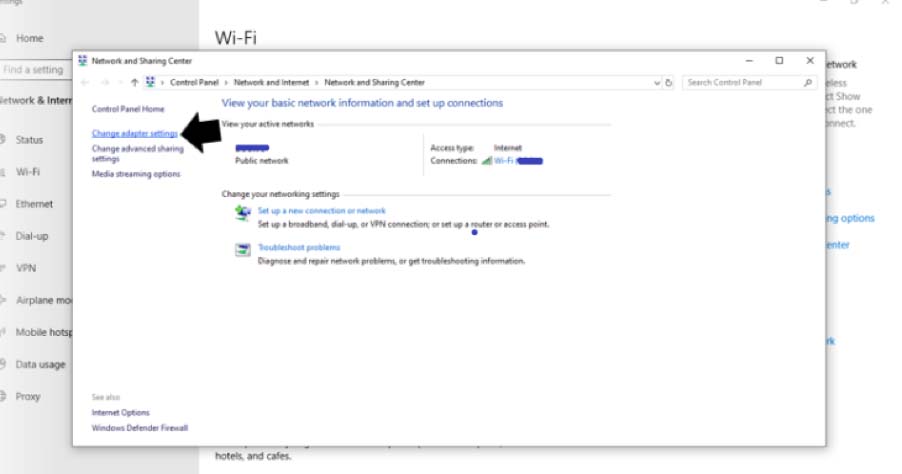
6) We are almost there to establish the connection. Couple of more steps to go before you start enjoying your VPN. Right-Click on the monitor or Wi-Fi icon on the bottom right-hand corner. Then Click on “Open Network and Sharing Center”
Click on “Change adapter settings”.
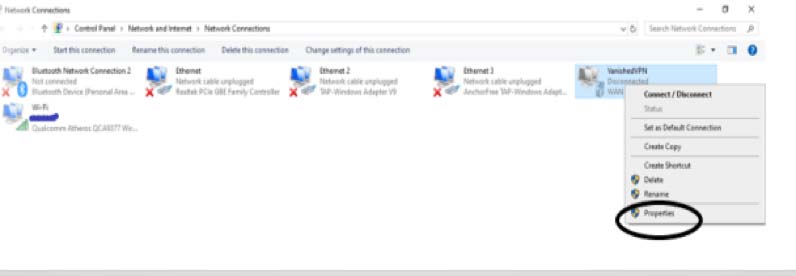
7) Right click on the VPN connection and go to “Properties”.
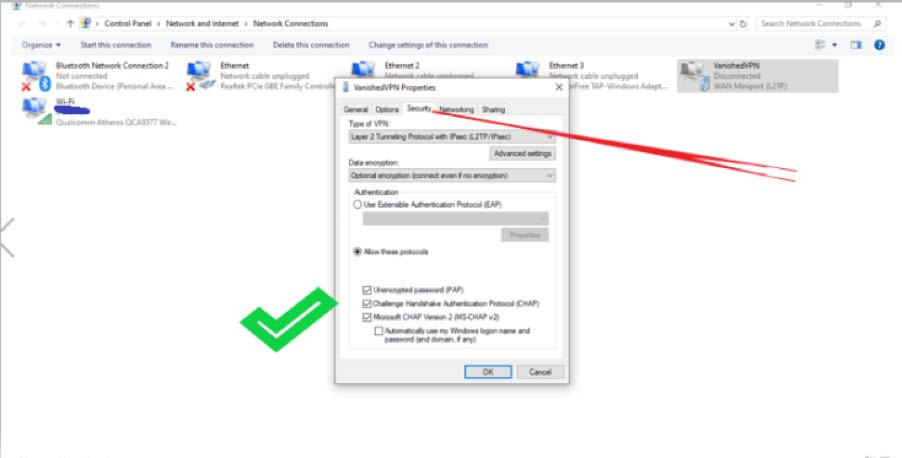
8) Go to “Security” tab. Here select “Allow these protocols” and check the top 3 boxes.
- Unencrypted password
- “Challenge Handshake Authentication Protocol (CHAP)” and deselect all others.
- Microsoft CHAP version 2
Click ‘OK’. Now your L2TP VPN connection is created, and all traffic will be encrypted.
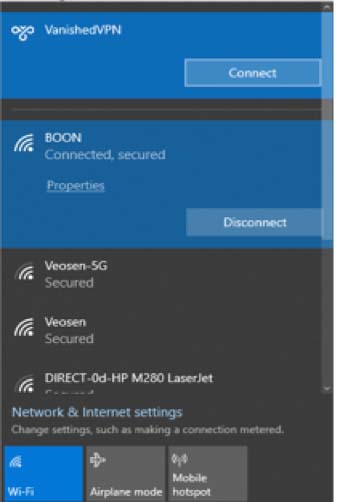
9) To connect to L2TP protocol click ok Network icon (Wi-Fi or wired) and click on the desired VPN connection.
This will open your “Network and Internet” settings. Click on desired VPN connection and press on “Connect” button.
OR
If you get an error at this point, you will need to make the registry change below.
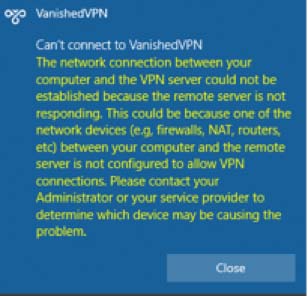
Note: A one-time registry change is required if the VPN server and/or client is behind NAT (e.g. home router). You must reboot your computer when done. It is good practice to backup the registry first.
For Windows Vista, 7, 8 and 10
Open a command prompt (CMD) as administrator, and copy and paste the red text below. Then re-boot your machine.
REG ADD HKLM\SYSTEM\CurrentControlSet\Services\PolicyAgent /v AssumeUDPEncapsulationContextOnSendRule /t REG_DWORD /d 0x2 /f
After the machine has been re-booted, connect to the VPN: Click on the wireless/network icon in your system tray, select the new VPN entry, and click Connect. If prompted, enter Your VPN Username and Password, then click OK.
Once you have completed these steps, you should be able to connect to the VPN, and see content from the location you have connected to (ie you should see the US Netflix catalogue if you are connected to the USA VPN Server). If you still see local content, we recommend that you complete the steps here to stop DNS leaking.
**Note – ALL CREDENTIALS ARE CASE SENSITIVE AND MUST BE ENTERED EXACTLY AS THEY ARE ON THE WELCOME EMAIL THAT YOU RECEIVED
How to fix L2TP no longer working after Mac OSX Big Sur upgrade
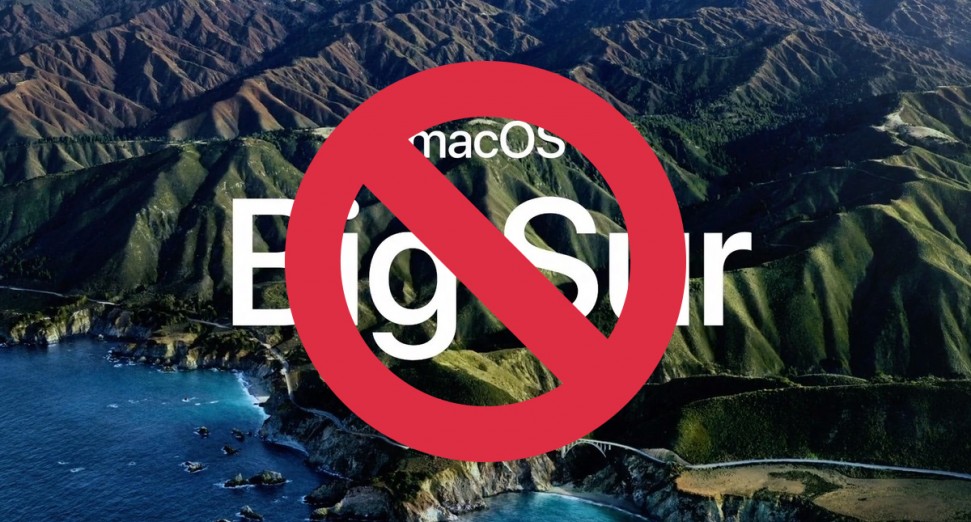
We’re aware of issues with the recent Mac OSX (Big Sur) which has effectively broken the inbuilt MAC VPN client.
If you have upgraded to Big Sur, and you connect via the inbuilt L2TP client, we recommend that you switch to TunnelBlick while we’re waiting for Apple to patch their new OS.
Tunnelblick can be downloaded here.
https://tunnelblick.net/release/Tunnelblick_3.8.7a_build_5770.dmg
You will need a config file for each VPN and your VPN credentials which you can find here:
https://www.vanishedvpn.com/my-account/ #apple #macosx #bigsur
How to add your VPN credentials to your Invizbox 2
You just received your InvizBox 2 and need to enter your VPN credentials but you are not sure where to enter them or where you can get them from. Or you have a new set of VPN credentials from your VPN provider and wish to use them with your InvizBox 2.
Entering your VPN credentials:
You will first need to reach your InvizBox 2’s Administration Interface. There are two ways to provide the IB2 with your VPN credentials, either during the onboarding or on the ‘VPN Account’ page in the Administration Interface.
Where to find your VPN credential
You can retrieve your VPN credentials here
Onboarding:
The first time you access the Admin Interface (either on your computer or using the Android or iOS app) you will be prompted to enter your VPN credentials during the onboarding.
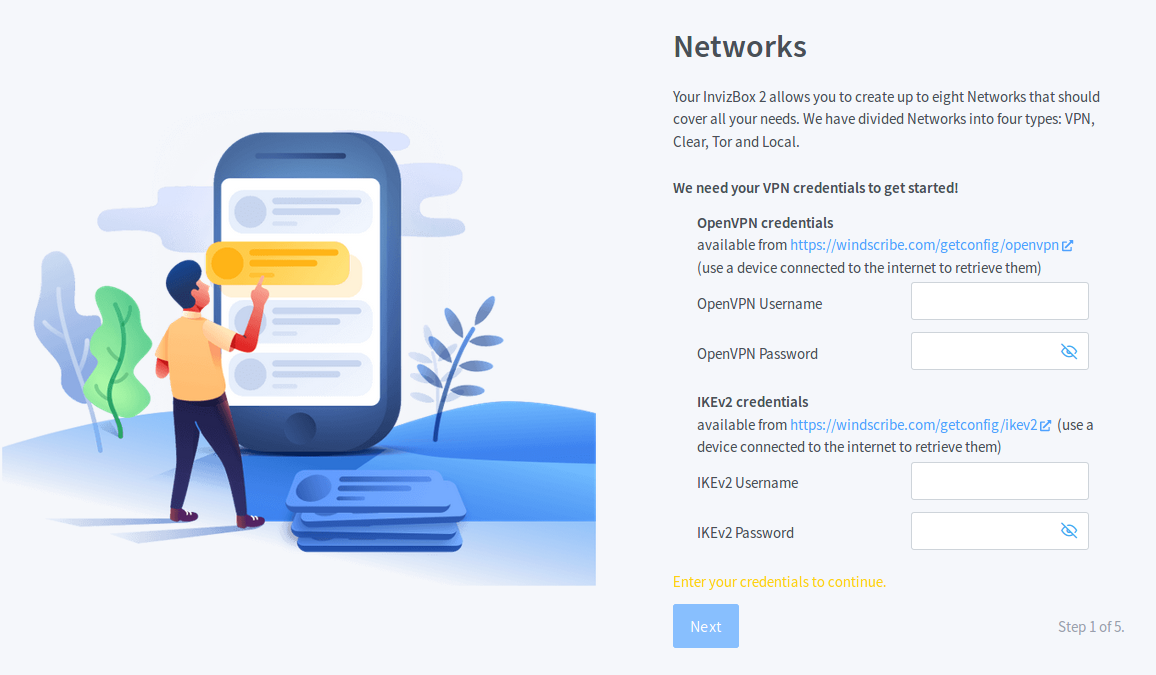
The above image shows the onboarding page from the Android app.
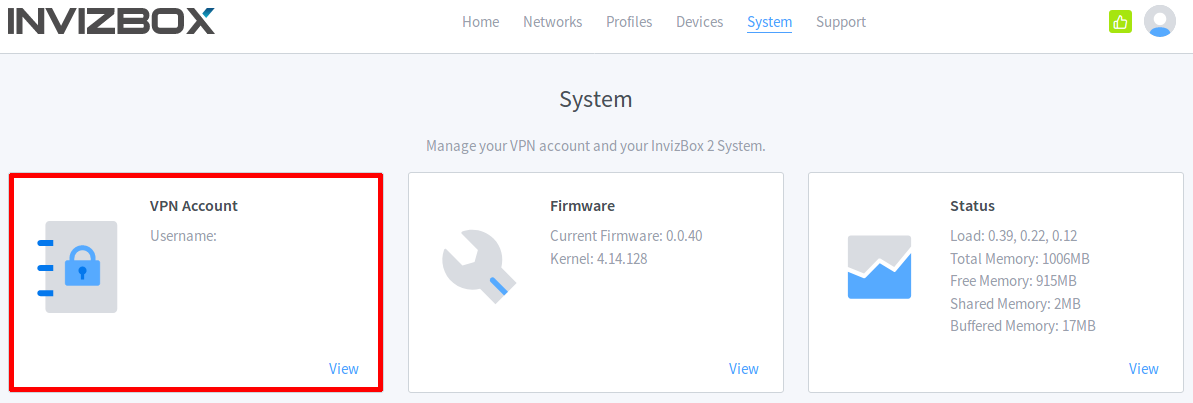
In the Administration Interface:
If you have completed the onboarding and wish to change your VPN credentials you can do so after logging in to the Administration Interface in the ‘System – VPN Account’ page.
How to access the Invizbox 2 admin interface
You are trying to reach the Administration Interface on your InvizBox 2 but don’t seem to be able to get there.
Connecting using the InvizBox 2 Administration app:
Follow these steps to connect using your mobile device:
1. You can download the InvizBox 2 Administration app from the Play Store or the App Store.
2. Connect your mobile device to the InvizBox 2’s WiFi hotspot.
3. Open the app.
If you are having issues ensure that your device is connected to one of your InvizBox 2’s networks.
Connecting using the browser:
Follow these steps to connect using your browser:
- Make sure your device is connected to one of the InvizBox 2 networks (see How do I connect to my InvizBox 2). You will not be able to reach the Administration Interface unless you are connected to the InvizBox 2.
- Open the following link in the browser of your choice: http://inviz.box
- If the above link didn’t work (eg. using a phone which is also connected to 4G), try to connect to the InvizBox 2 using its IP address. For example, for the network present during the first setup named “InvizBox 2 VPN”, that would be http://10.154.0.1.
- If none of the above worked, you may want to try accessing the Administration Interface from another browser (from other customers reports, it seems that sometimes using Firefox was the only one that worked).
Note: All of the networks on your InvizBox 2 use different IP addresses. If you are trying to access the Administration Interface using an IP address as in step 3 above but are not connected to the first InvizBox 2 VPN network you will need to use one of the following addresses:
- http://10.154.1.1 – for the 2nd VPN network
- http://10.154.2.1 – for the 3rd VPN network
- http://10.154.3.1 – for the 4th VPN network
- http://10.154.4.1 – for the Tor network
- http://10.154.5.1 – for the 1st Clear network
- http://10.154.6.1 – for the 2nd Clear network
- http://10.154.7.1 – for the Local network
Note: If none of the above works for you¸ don’t hesitate to contact us by opening a support ticket with Invizbox. In order for them to have some context, please let us know what your operating system is and what browsers you tried and recent changes you made to your InvizBox 2 configuration.
How to sign up for Hotstar premium
This guide gives tips and a work around solution to sign up for Hotstar.com premium.
Before starting, sign up for a VanishedVPN plan, and follow the guides to setup the sports VPN on your device, and connect.
Make sure you are connected to our India VPN
Once connected to the VPN, visit hotstar.com , click on the movies tab, and pick a ‘premium’ title to watch.
Click on the ‘start your membership’, and choose which package you want (the monthly is 299RPS = approx $6 AUD, and the annual is 999RPS = approx $20 AUD)

Next, click on ‘Have a facebook or email account’ and then enter your email address on the next screen.
Click through, and enter your credit or debit card details
If you’re successful, congratulations, you can now access live HD streams for EPL, movies , HBO and much more – Enjoy.
If you’re unsuccessful, there are 2 options which have been proven to work:
1) Apply for a Qantas American Express Discovery Card. Wait for it to arrive (around 1 week), then use that . This card has no annual fee, and reasonable earning requirements, so should be accessible to most people. Customers have had a 100% success rate using this card. NOTE WE ARE NOT QUALIFIED TO PROVIDE FINANCIAL ADVICE, and we are not recommending this card as a financial solution. We are simply sharing the fact that we know it works for hotstar premium sign ups.
2) There is also an option to sign up via itunes. This is a ‘work around’ . It will take around half an hour, and it will require you to get an Indian itunes voucher (as you’ll need an itunes account in the India store with credit).
This has been tested by some customers and it works. The following is advice. Attempt at your own risk. We do not offer support for this.
You will need :
1) To setup an account in the India itunes store (video below shows you how)
2) An itunes voucher which is valid in the India itunes store (we used this seller . You can search on ebay & Amazon) Make sure your voucher is in Ruppees (we bought the RPS 799 which = approx $15AUD)
Note – Hotstar won’t charge you for initial sign up. There is a 30 day free trial, so you can spend the credit on music etc if you want after you’ve signed up.
Once you have you voucher, follow the instructions in the video below, and you’ll be setup .
When you setup iTunes India account and Hotstar make them the same email so they link automatically.
Part 1 – Create Indian itunes account
Part 2 – Sign up for Hotstar
Note – When you get to the end, you may get the ‘OK’ message, and then an error afterwards. If this happens, contact hello@hotstar.com (or via twitter), and tell them you tried to sign up via itunes, but it failed at the end. Customers who have done this have reported that they will then fix it. Remember, you are meant to be in India to use this Service, so be creative if asked.
How to create a random address and identity
Some sites will require you to have an address in the country where they are based when you sign up for them.
If you need to generate an address or postcode for signing up, just use the identity generator on this site.
How to reduce your Netflix bill by up to 70%
Its a well known fact that Netflix catalogues vary by country, and Vanished VPN allows you to access the USA catalogue which has approx 3x the content of some other countries (including Australia). But, did you know that Netflix also varies its charges by country ?
So what ?
By using Vanished VPN, you can connect to our VPN servers in Turkey (the cheapest country in the world for Netflix), set up a subscription, and then just use Netflix as you would normally, and save a lot of $ (you will need to cancel your current subscription too).
This is 100% legal.
The table below shows a quick comparison of the cost of a Netflix subscription in the Turkey , compared to Australia & Switzerland (the most expensive country in the world for Netflix).
All prices are in $USD for comparison, and correct at time of writing (Aug 2019)
| COUNTRY | BASIC SUB | STANDARD SUB | PREMIUM SUB |
| Switzerland | $11.72 | $16.65 | $21.58 |
| Spain | $9.11 | $14.80 | $18.22 |
| UK | $7.32 | $10.99 | $14.66 |
| Australia | $6.99 | $9.79 | $12.59 |
| Turkey | $2.62 | $4.58 | $6.55 |
As you can see, if you’re in Australia, you can save up to $6 USD per month ($72 USD per year) on each plan by re-registering your Netflix account in Turkey.
If you’re in Switzerland, you can save $15 USD per month ($180 USD per year) on a premium subscription by using this method.
See full list of countries here
Here’s how:
To gain the maximum benefit, you will need to cancel your existing Netflix account, and then sign up for the new one on the day that the old account expires. You will need a new email address (just set one up on gmail if you don’t have one). If you also pay with a different credit card to the original account, you will get a free month trial (which reduces the cost even further).
Once you’ve done this:
1) Register for a Vanished VPN subscription if you don’t already have one.
2) Connect to our Turkey VPN servers (OpenVPN file attached to this article)
3) Goto Netflix.com . If your existing account signs in automatically, just sign out (click the arrow in the top right hand corner).
4) You should now be able to scroll down, and click on ‘pick your price’ to see the prices in TL (Turkish Lira).

5) Click on the ‘join free for a month’, and then click through the following screens to enter your new email address and new credit card details (you can use the same credit card that you used on your original account, but you won’t get the freee month).
6) Disconnect from the Turkey VPN, and return to either your home Netflix (or connect to our US VPN for USA Netflix).
7) Netflix & Chill …..
Note, your credit card company may charge a small foreign transaction fee for paying in TL. This is likely to be much lower than the amount that you’re saving by using this method, but check with your credit card provider if you aren’t sure.
Also note that by setting up a new account, you will lose your Netflix history, so if this is more important than the savings, you should stay where you are.

How to setup Vanished VPN on Android Smart TVs.
1- Generally, Smart TV android versions don’t support all android apps however, you can side-load Vanished VPN app by downloading & installing the .apk file.
– https://apkpure.com/vanished-vpn/com.vanishedvpn.mobile
2- You can also setup native Android VPN as well, here’s how it works
– https://www.vanishedvpn.com/android-l2tp-vpn-setup-guide/
3- You can use our Invizbox-2 VPN router, it plugs directly ahead of your home router & creates VPN based WiFi so all devices connected to it would have VPN,
For more info – https://www.vanishedvpn.com/the-amazing-invizbox/
How to use the Vanished VPN IOS App
The easiest way to connect your iPhone or iPad is to use our IOS app. Just search for Vanished VPN on the App Store or follow this link
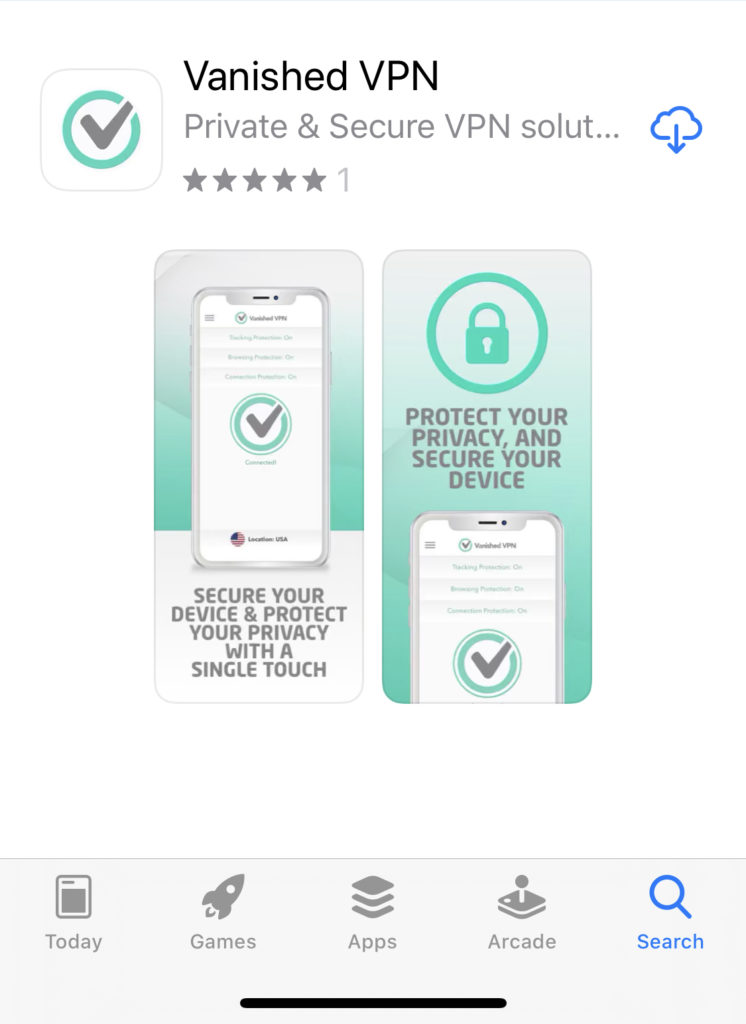
You will need an active Vanished VPN subscription which can be purchased here.
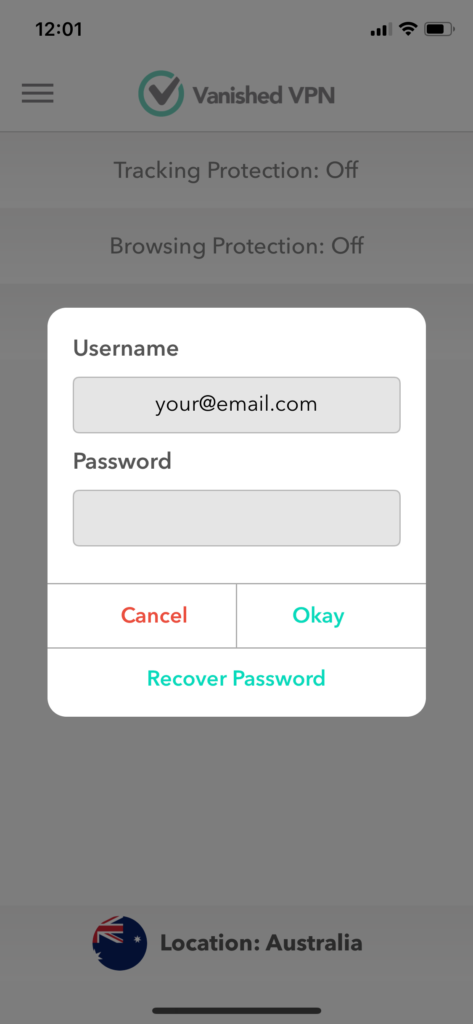
Once you open the app, click on the grey tick in the centre of the screen. You should see a pop up box asking you to enter your VPN credentials. Click dismiss, and you should be prompted to enter your VPN credentials which you can find in the ‘my account‘ section of our site.
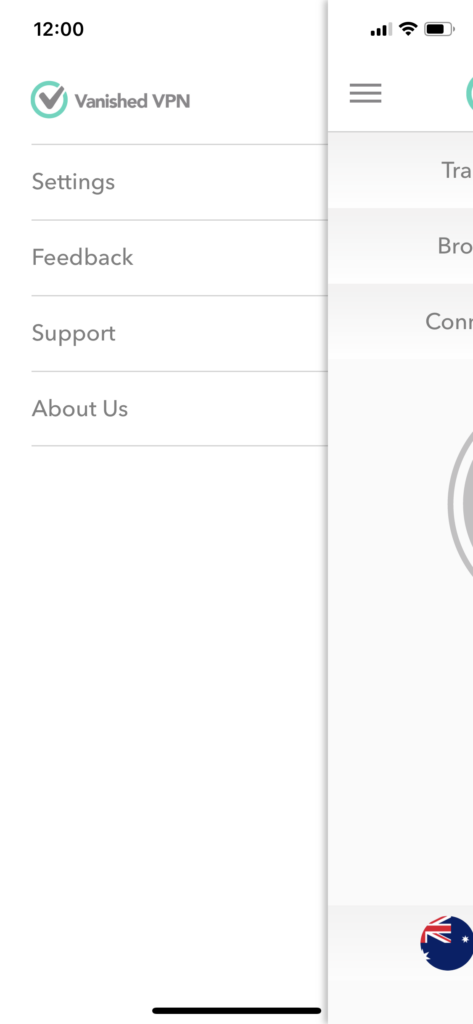
If you don’t get prompted, simply click the menu (3 bars in the top left of the screen), and select ‘settings’, which will open the credentials box.
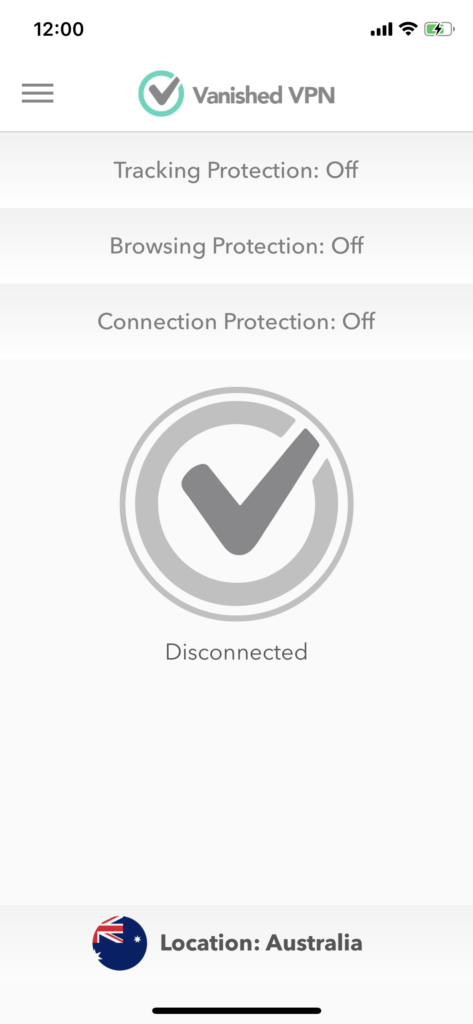
To connect, from the main screen, click the country icon at the bottom of the screen, and select the location you want to connect to.
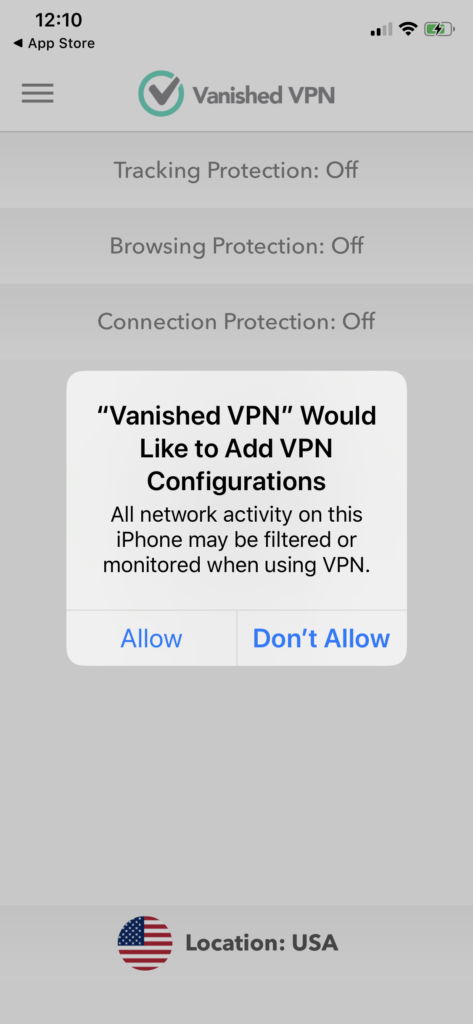
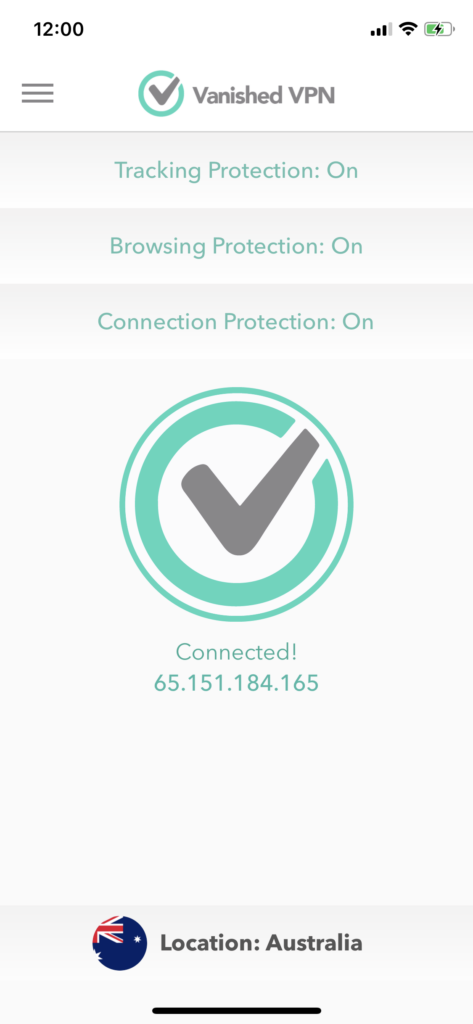
To connect or disconnect, click the Vanished VPN logo in the centre of the screen. This will turn green when successfully connected. The first time you use the app, you will be prompted that the app needs to update configurations. Click allow, and enter your pin to enable this.
Once setup, you won’t need to enter your credentials again. Just click on the tick to either connect or disconnect from your chosen location.
Trouble shooting.
The app needs to create a VPN in the settings of your device. If there is already a VPN with the same name in the settings, you may need to delete this. On your device, go to setttings / VPN. Click the ‘I’ next to the old VPN connections, and then ‘delete VPN’. Once this is done, delete & re-install the app, and go through the setup again.
How to play Lost Ark if you are outside Korea
Lost Ark was released on Nov 7th, 2018, which is good news, but access is currently restricted to gamers in Korea. Vanished VPN subscribers who do not live in Korea can bypass the restrictions by connecting to our Korea VPN, and following the steps below.

Step by Step Guide To Download & Play Lost Ark When You Are Living outside of Korea
Step 1: Get one verified Phone Lost Ark account. We recommend OBTGAME for this (unless you have a friend in South Korea who can help you with this.)

Step 2:Get connected to the Vanished VPN South Korea VPN. You can download the OpenVPN config files via the ‘my account‘ section of our site. If you are using L2TP, simply connect to Korea.vanishedvpn.com
Step 3: Download Stove launcher. Follow the step by step to type the blue button to complete install. After installed successfully, one Stove launcher icon will be showed on desktop.
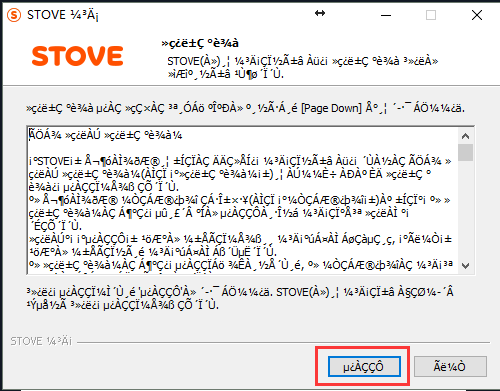
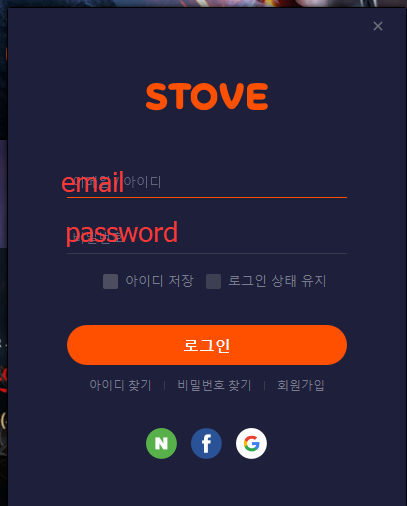
Step 4: Run Stove launch, login your Lost Ark account. Before starting to download client, here’s some more details of Stove launcher translated to English.
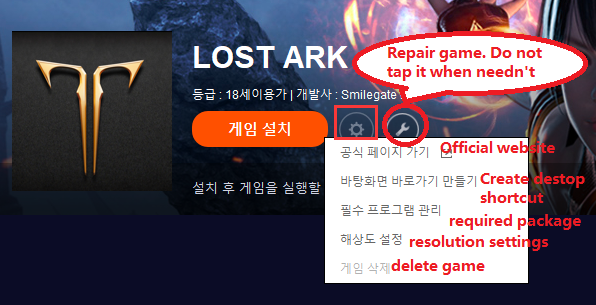
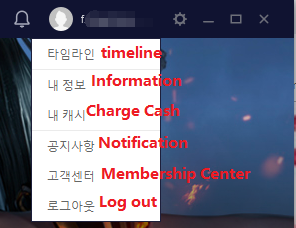
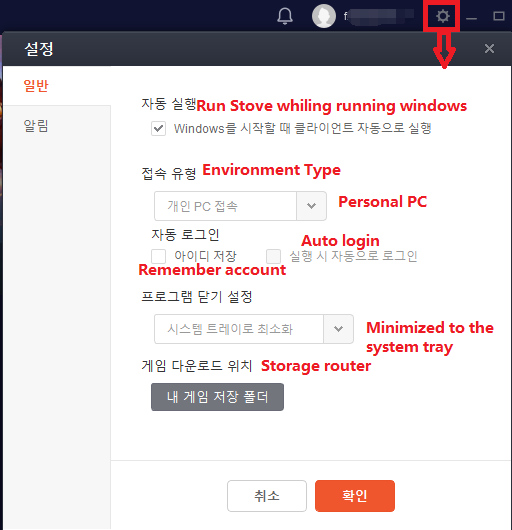
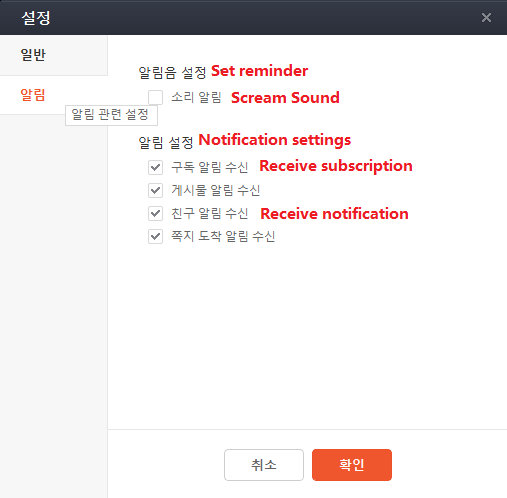
If you haven’t used Stove launcher, it will ask you to update.
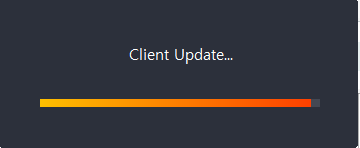
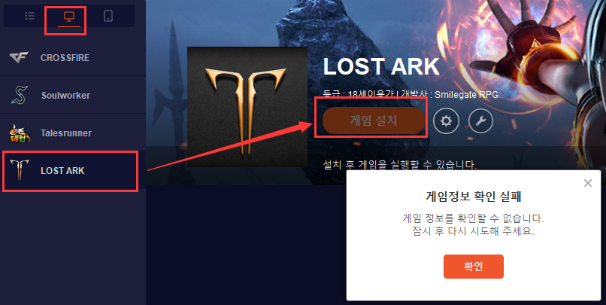
Step 5: Tap Lost Ark game, then tap the Orange button to start downloading Lost Ark client.
Step 6: After downloading and updating client successfully, you can then create a character and start to play Lost Ark from anywhere outside Korea.
Login -> Tap the computer icon -> Tap Lost Ark -> Tap the Orange button
If you get an error as in the photo below, it means the VPN has disconnected. Please re-connect (as per step 2)
If everything are working well, then your client will start downloading.
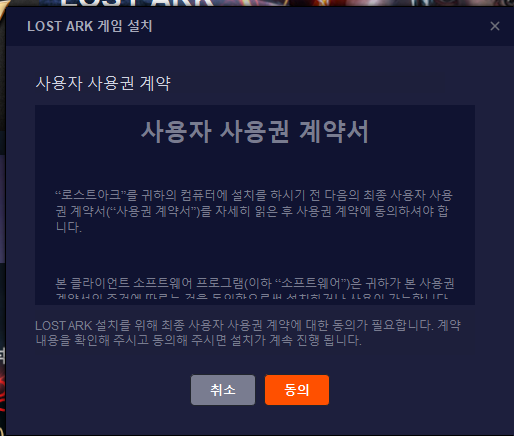
Choose the storage folder/disk.
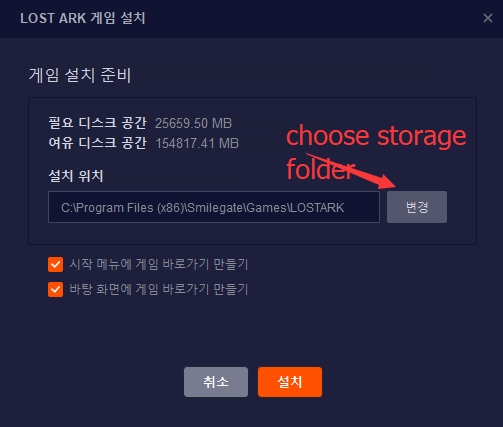
Be patient, it may take several minutes for the bar to appear

Download Lost Ark client successfully. Tap the blue button to launch game.

You’ll be asked to set a 2nd password first. The 2nd password will consist of 6 to 8 digits. Make sure you remember it. If you’re locked out, you won’t be able to unlock.

FAQs
- Is Lost Ark free to play?
Yes. It is free to play with cash shop.
- What kind of VPN is best for Lost Ark? / Should we keep VPN online while downloading and playing?
Vanished VPN is a great solution, as we don’t cap data or throttle, and we’re one of the best value VPNs in the world. We also have a rock solid solution for USA Netflix, Hulu, BBC iPlayer and many more.
Only download and launch requires the use of the South Korea VPN. While playing its better to disconnect the VPN
- What is the size of the game client?
It is around 25GB. Players should leave more than 50GB space for this game. You may need to update the client from time to time.
- When will Lost Ark be released in NA/EU?
It seems Smilegate hasn’t release any nws on it. Maybe players who are living outside of South Korea have to wait one or two years.
- Where can I buy verified Phone Lost Ark account?
We recommend this website OBTGAME. Whatever product you want to buy, please read the product description carefully.